The Ultimate Gelish Polygel Tutorial: Achieve Long-Lasting and Perfect Nails at Home
If you’ve been looking for a game-changing nail enhancement solution that can give you an instant salon-quality finish, then Gelish Polygel is definitely worthy of your attention. This revolutionary nail kit has taken the beauty world by storm, allowing nail enthusiasts to create stunning, strong and long-lasting nails at home.
But where do you start, and how do you get the best results possible? Look no further! We’ve put together a step-by-step Gelish Polygel tutorial that will guide you through the process of achieving an impeccable set of nails that will stay beautiful for weeks on end.
Here’s our ultimate Gelish Polygel tutorial in 10 steps:
Step 1: Gather your toolkit
Start by gathering all the necessary tools and products, including the Gelish Polygel kit itself, a nail file, a buffer, alcohol wipes, and a Gelish nail lamp.
Step 2: Prep your nails
File and shape your nails to your desired length and shape, then push back your cuticles using an orange stick or cuticle trimmer. Clean your nails with an alcohol wipe to remove any excess oils.
Step 3: Apply base coat
Using a brush, apply a thin layer of Gelish Polygel base coat to your nails, making sure to avoid the cuticle area. Cure your nails under the Gelish lamp for 30 seconds.
Step 4: Choose your Polygel shade
Select your desired Gelish Polygel shade and squeeze a small amount onto the brush. Place the product onto the nail, pressing and spreading it into place.
Step 5: Sculpt your nails
Using your brush, create a smooth and even surface by gently patting the Polygel onto the nail surface. Take some time to build up the product and shape it to your liking, working one nail at a time.
Step 6: The perfect cure
Using your Gelish nail lamp, cure each nail for 60 seconds.
Step 7: Refine your nails
Once your nails have fully cured, gently buff the surface of your nails with a buffer to smooth out any imperfections and to create a perfect finish.
Step 8: Choose your top coat
Select your desired Gelish Polygel top coat and apply a thin layer to your nails, ensuring the edges are fully sealed. Cure under the lamp for 60 seconds.
Step 9: Wipe away the tacky layer
After curing, remove the tacky layer on top of your nails by wiping them down with an alcohol wipe.
Step 10: The final result
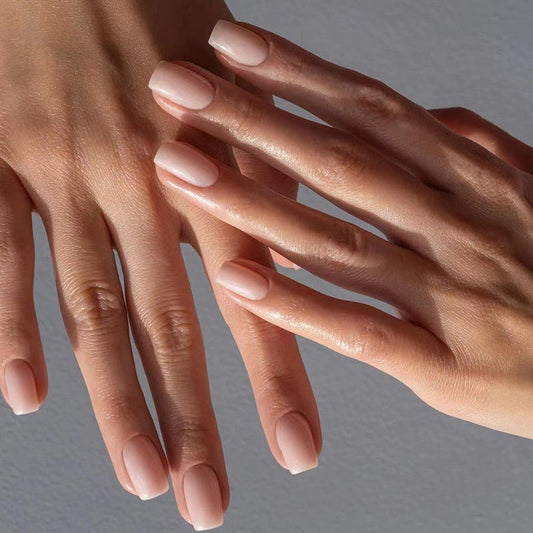
Admire your perfect set of Gelish Polygel nails that will last up to three weeks.
With this easy-to-follow Gelish Polygel tutorial, you can achieve flawless and long-lasting nails that will surely make heads turn. Now, it’s time to say goodbye to chipped, brittle nails and say hello to a salon-worthy manicure that you can do at home!
But where do you start, and how do you get the best results possible? Look no further! We’ve put together a step-by-step Gelish Polygel tutorial that will guide you through the process of achieving an impeccable set of nails that will stay beautiful for weeks on end.
Here’s our ultimate Gelish Polygel tutorial in 10 steps:
Step 1: Gather your toolkit
Start by gathering all the necessary tools and products, including the Gelish Polygel kit itself, a nail file, a buffer, alcohol wipes, and a Gelish nail lamp.
Step 2: Prep your nails
File and shape your nails to your desired length and shape, then push back your cuticles using an orange stick or cuticle trimmer. Clean your nails with an alcohol wipe to remove any excess oils.
Step 3: Apply base coat
Using a brush, apply a thin layer of Gelish Polygel base coat to your nails, making sure to avoid the cuticle area. Cure your nails under the Gelish lamp for 30 seconds.
Step 4: Choose your Polygel shade
Select your desired Gelish Polygel shade and squeeze a small amount onto the brush. Place the product onto the nail, pressing and spreading it into place.
Step 5: Sculpt your nails
Using your brush, create a smooth and even surface by gently patting the Polygel onto the nail surface. Take some time to build up the product and shape it to your liking, working one nail at a time.
Step 6: The perfect cure
Using your Gelish nail lamp, cure each nail for 60 seconds.
Step 7: Refine your nails
Once your nails have fully cured, gently buff the surface of your nails with a buffer to smooth out any imperfections and to create a perfect finish.
Step 8: Choose your top coat
Select your desired Gelish Polygel top coat and apply a thin layer to your nails, ensuring the edges are fully sealed. Cure under the lamp for 60 seconds.
Step 9: Wipe away the tacky layer
After curing, remove the tacky layer on top of your nails by wiping them down with an alcohol wipe.
Step 10: The final result
Admire your perfect set of Gelish Polygel nails that will last up to three weeks.
With this easy-to-follow Gelish Polygel tutorial, you can achieve flawless and long-lasting nails that will surely make heads turn. Now, it’s time to say goodbye to chipped, brittle nails and say hello to a salon-worthy manicure that you can do at home!