Achieving Stunning Poly Extension Gel Nails - A Step by Step Tutorial!
Ladies, do you want to achieve gorgeous nails without spending a fortune at the nail salon? If so, then look no further than Poly Extension Gel! This popular method of nail extension not only provides a long-lasting manicure but also allows you to flaunt your creativity with a variety of colors and designs.
If you're new to the whole process, get ready for a comprehensive tutorial on Poly Extension Gel that will help you achieve stunning results.
Step 1: Gather Your Materials
It's time to assemble all the necessary tools before starting the process. Get a nail file, a buffer, a cuticle pusher, a nail clipper and of course, your Poly Extension Gel kit (which should contain a base coat, extension gel, nail forms, topcoat, UV lamp, and a nail brush).
Step 2: Prepare Your Nails
Start with clean and dry hands. Clip your nails to your desired length and use a file to shape them. Next, gently push back your cuticles and buff your nails to roughen their surface. This will help the gel to adhere better.
Step 3: Apply the Base Coat
Apply a thin layer of the base coat to each nail. Make sure to clean the edges of your nails to avoid lifting and chipping. Then, cure them under the UV lamp for 30 seconds.
Step 4: Attach Nail Forms
Now it's time to select nail forms that fit your nail shape snugly. Fold the edges of each form inwards to create a stable base, and then attach them to your nails.
Step 5: Apply Poly Extension Gel
Apply a small blob of the Poly Extension Gel to the edge of the nail form. Spread it evenly over your nails, starting from the cuticles and moving towards the tips. Make sure not to touch your skin as this may cause lifting.
Step 6: Cure Under UV Lamp
Once you've applied the gel, cure your nails under a UV lamp for about 60 seconds. Check for any abnormalities and, if there are any, correct them before curing again.
Step 7: Shape and Buff
Now that your nails are cured, use a buffer to shape and smooth your nails. Be sure to buff and file lightly to avoid damaging the gel or your nails' surfaces.
Step 8: Apply the Top Coat
Once you've shaped and buffed your nails, apply a thin layer of topcoat. Cure them under the UV lamp again for 30 seconds until fully dry.
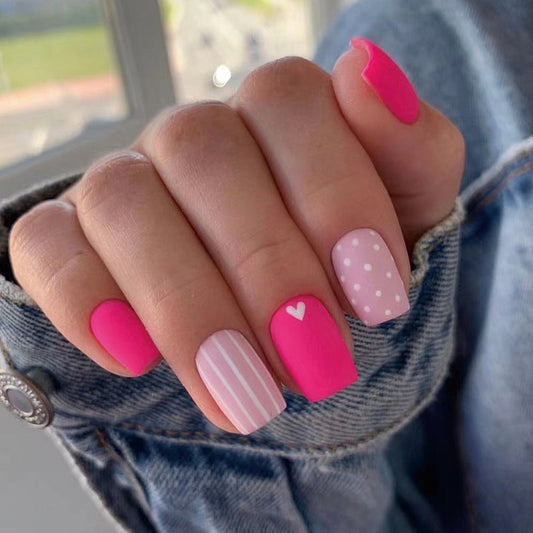
Voila! You have successfully achieved stunning Poly Extension Gel Nails. You can now flaunt your creative designs that are long-lasting and gorgeous.
In conclusion, Poly Extension Gel is a fantastic option for ladies who want to amplify their nails' natural beauty. With the right tools, patience, and practice, you can achieve salon-quality nails at home. So, what are you waiting for? Get these tips and techniques rolling and have fun with your new Poly Extension Gel nail kit!
If you're new to the whole process, get ready for a comprehensive tutorial on Poly Extension Gel that will help you achieve stunning results.
Step 1: Gather Your Materials
It's time to assemble all the necessary tools before starting the process. Get a nail file, a buffer, a cuticle pusher, a nail clipper and of course, your Poly Extension Gel kit (which should contain a base coat, extension gel, nail forms, topcoat, UV lamp, and a nail brush).
Step 2: Prepare Your Nails
Start with clean and dry hands. Clip your nails to your desired length and use a file to shape them. Next, gently push back your cuticles and buff your nails to roughen their surface. This will help the gel to adhere better.
Step 3: Apply the Base Coat
Apply a thin layer of the base coat to each nail. Make sure to clean the edges of your nails to avoid lifting and chipping. Then, cure them under the UV lamp for 30 seconds.
Step 4: Attach Nail Forms
Now it's time to select nail forms that fit your nail shape snugly. Fold the edges of each form inwards to create a stable base, and then attach them to your nails.
Step 5: Apply Poly Extension Gel
Apply a small blob of the Poly Extension Gel to the edge of the nail form. Spread it evenly over your nails, starting from the cuticles and moving towards the tips. Make sure not to touch your skin as this may cause lifting.
Step 6: Cure Under UV Lamp
Once you've applied the gel, cure your nails under a UV lamp for about 60 seconds. Check for any abnormalities and, if there are any, correct them before curing again.
Step 7: Shape and Buff
Now that your nails are cured, use a buffer to shape and smooth your nails. Be sure to buff and file lightly to avoid damaging the gel or your nails' surfaces.
Step 8: Apply the Top Coat
Once you've shaped and buffed your nails, apply a thin layer of topcoat. Cure them under the UV lamp again for 30 seconds until fully dry.
Voila! You have successfully achieved stunning Poly Extension Gel Nails. You can now flaunt your creative designs that are long-lasting and gorgeous.
In conclusion, Poly Extension Gel is a fantastic option for ladies who want to amplify their nails' natural beauty. With the right tools, patience, and practice, you can achieve salon-quality nails at home. So, what are you waiting for? Get these tips and techniques rolling and have fun with your new Poly Extension Gel nail kit!